Integrate Self-Hosted ONLYOFFICE Editors with Nextcloud Using Docker

When I first tried integrating ONLYOFFICE editors into my self-hosted Nextcloud setup, I assumed it would be a quick, one-evening project. I was wrong, it ended up taking several evenings of trial and error. The root of my frustrations? I installed the wrong component of the ONLYOFFICE suite.
This guide aims to save you that time by walking you through the correct setup of ONLYOFFICE Document Server using Docker, and integrating it with an existing Nextcloud instance.
What Is ONLYOFFICE?
ONLYOFFICE is an open-source office suite that enables you to view, edit, and collaborate on documents, spreadsheets, presentations, PDFs, and more. It's available for web, desktop, and mobile platforms. In my experience, it offers the best editors for office documents on Linux.
Here's some of the things that ONLYOFFICE has to offer:
| Component | Description |
|---|---|
| Desktop Editors | Desktop applications for Windows, macOS and Linux |
| Mobile Editors | Mobile apps for Android and iOS |
| Docs (Document Server) | Web-based office suite for integration with platforms like Nextcloud |
| Groups | Team collaboration suite (CRM, projects, email, etc.) |
| DocSpace | Document hub for room-based collaboration |
For this guide, we’ll be using the ONLYOFFICE Docs, also known as ONLYOFFICE Document Server.
Prerequisites
Before we begin, make sure you have the following:
- A Docker host up and running
- Basic familiarity with Docker and Docker Compose
- A working Nextcloud instance
- Admin access to your Nextcloud setup
- Basic knowledge on how to manage Nextcloud
Setting Up ONLYOFFICE Docs in Docker
Generate a JWT Secret
ONLYOFFICE uses a JWT (JSON Web Token) secret to secure communication between Nextcloud and the Document Server. Generate a strong, random secret using a password manager or any secure method. This will be used in both the container and Nextcloud settings.
Option 1: Docker CLI
docker run -i -t -d -p 8081:80 --name onlyoffice-docs --restart=always \
    -v ./logs:/var/log/onlyoffice  \
    -v ./data:/var/www/onlyoffice/Data  \
    -v ./lib:/var/lib/onlyoffice \
    -v ./db:/var/lib/postgresql \
    -e JWT_SECRET=[YOUR SECRET HERE] \
    onlyoffice/documentserver
Option 2: Docker Compose
services:
  docs:
    image: onlyoffice/documentserver
    container_name: onlyoffice-docs
    restart: 'unless-stopped'
    ports:
      - 8081:80
    environment:
      JWT_SECRET: '[YOUR SECRET HERE]'
    volumes:
      - ./logs:/var/log/onlyoffice
      - ./data:/var/www/onlyoffice/Data
      - ./lib:/var/lib/onlyoffice
      - ./db:/var/lib/postgresql
Testing the Document Server
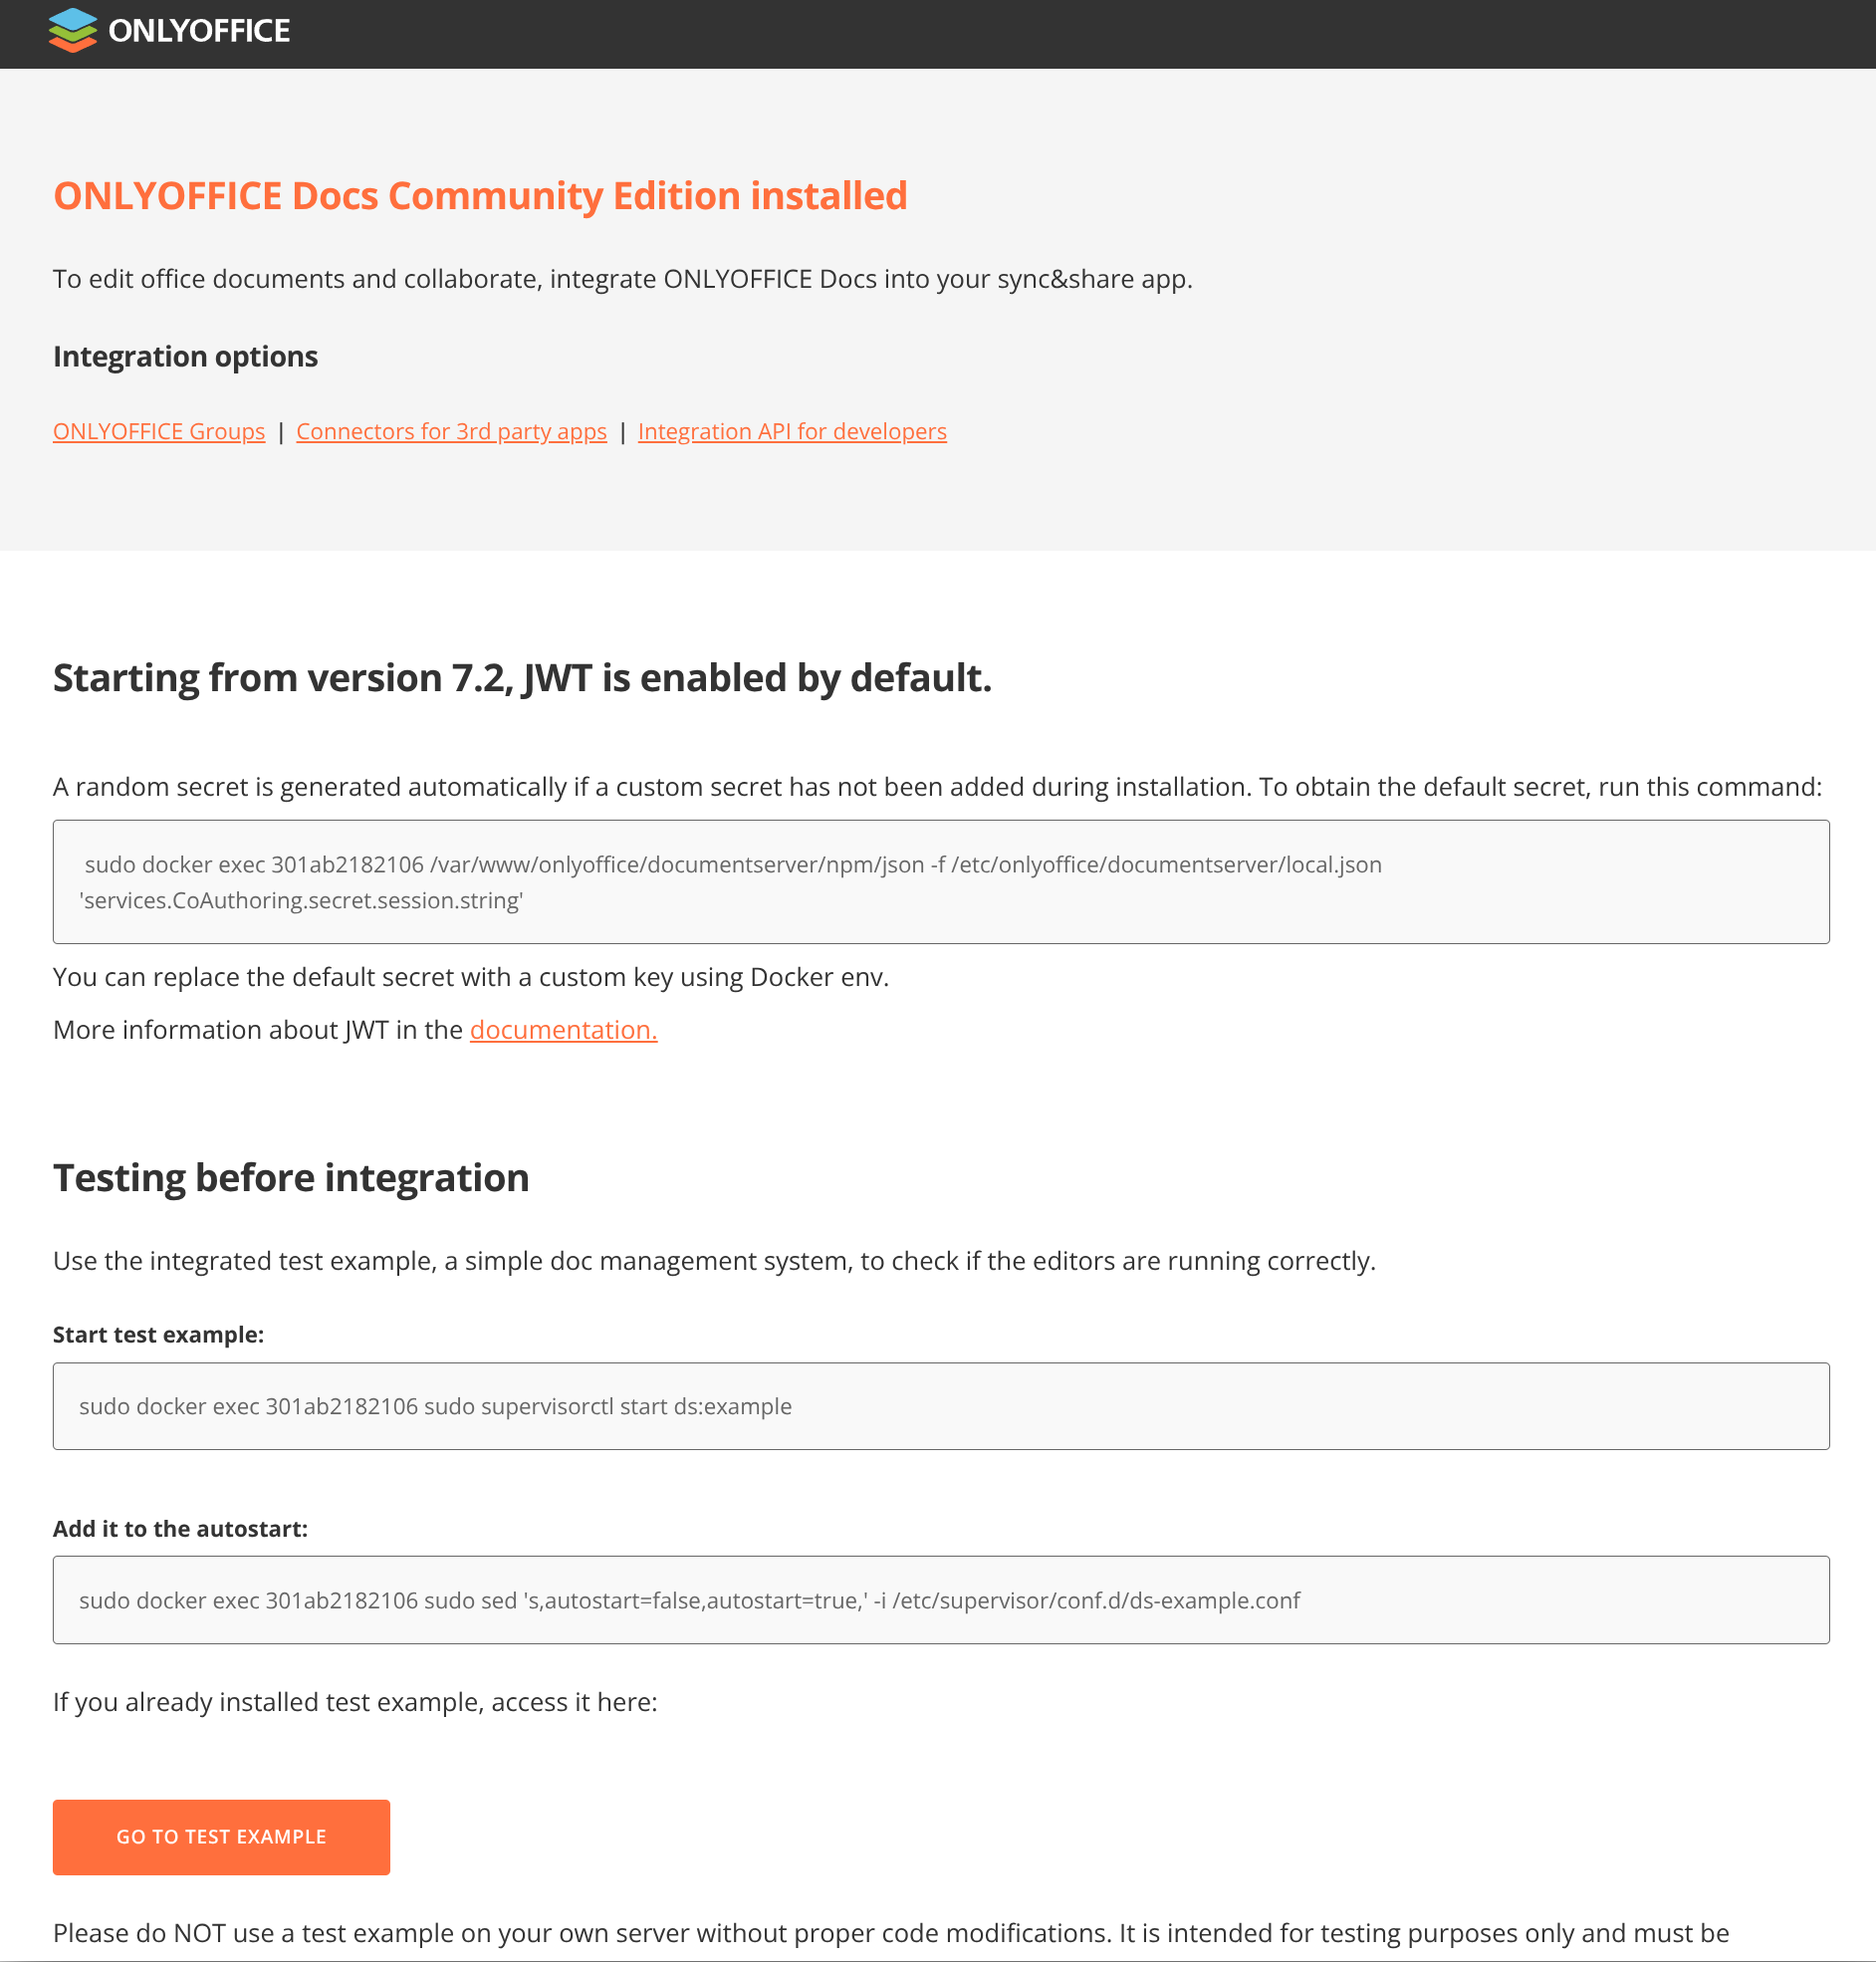
Wait a few moments for the container to fully start up. Then, open a browser and visit: http://your-docker-server:8081
You should see the following welcome page:
Optional: Run the Integrated Test Example
You can run the integrated test example to verify everything is working correctly:
Docker CLI
Docker Compose
The response should be:
Now, click the `GO TO TEST EXAMPLE` button on the homepage. You’ll see the following interface:
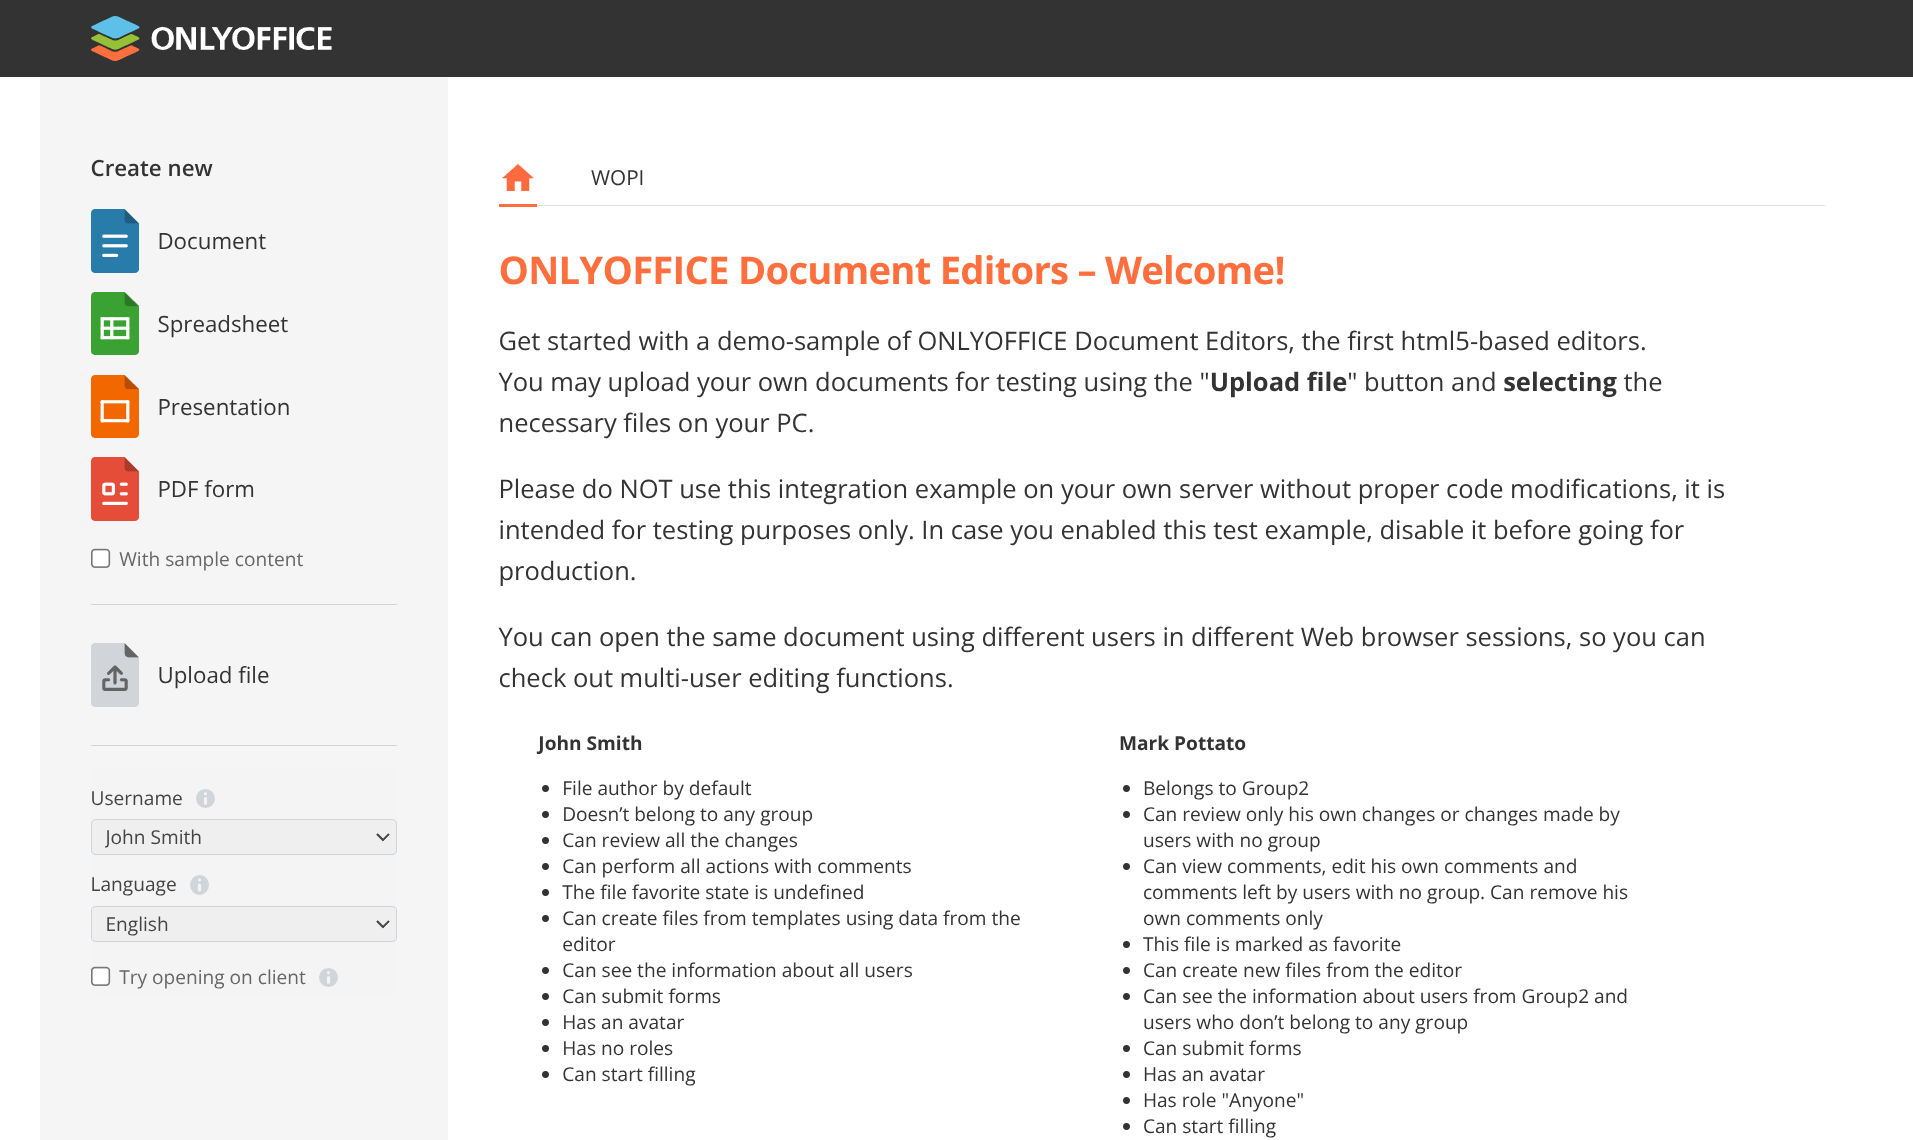
You can now explore the various editors (text, spreadsheet, presentation) in a demo environment.
Cleanup the Example (Recommended)
Before using ONLYOFFICE in production, it's best to stop and remove the test environment:
Docker CLI
Docker Compose
Then recreate the container without running the test example.
Configure ONLYOFFICE in Nextcloud
- Log in to Nextcloud as an admin
- Click your profile picture =>
+ Apps - Go to the
Office & textcategory - Search for
ONLYOFFICEand clickDownload and enable - After installation, go to
Administration settings - Click
ONLYOFFICEunder theAdministrationsection - Enter the ONLYOFFICE Docs address and the JWT Secret
- Click
Save
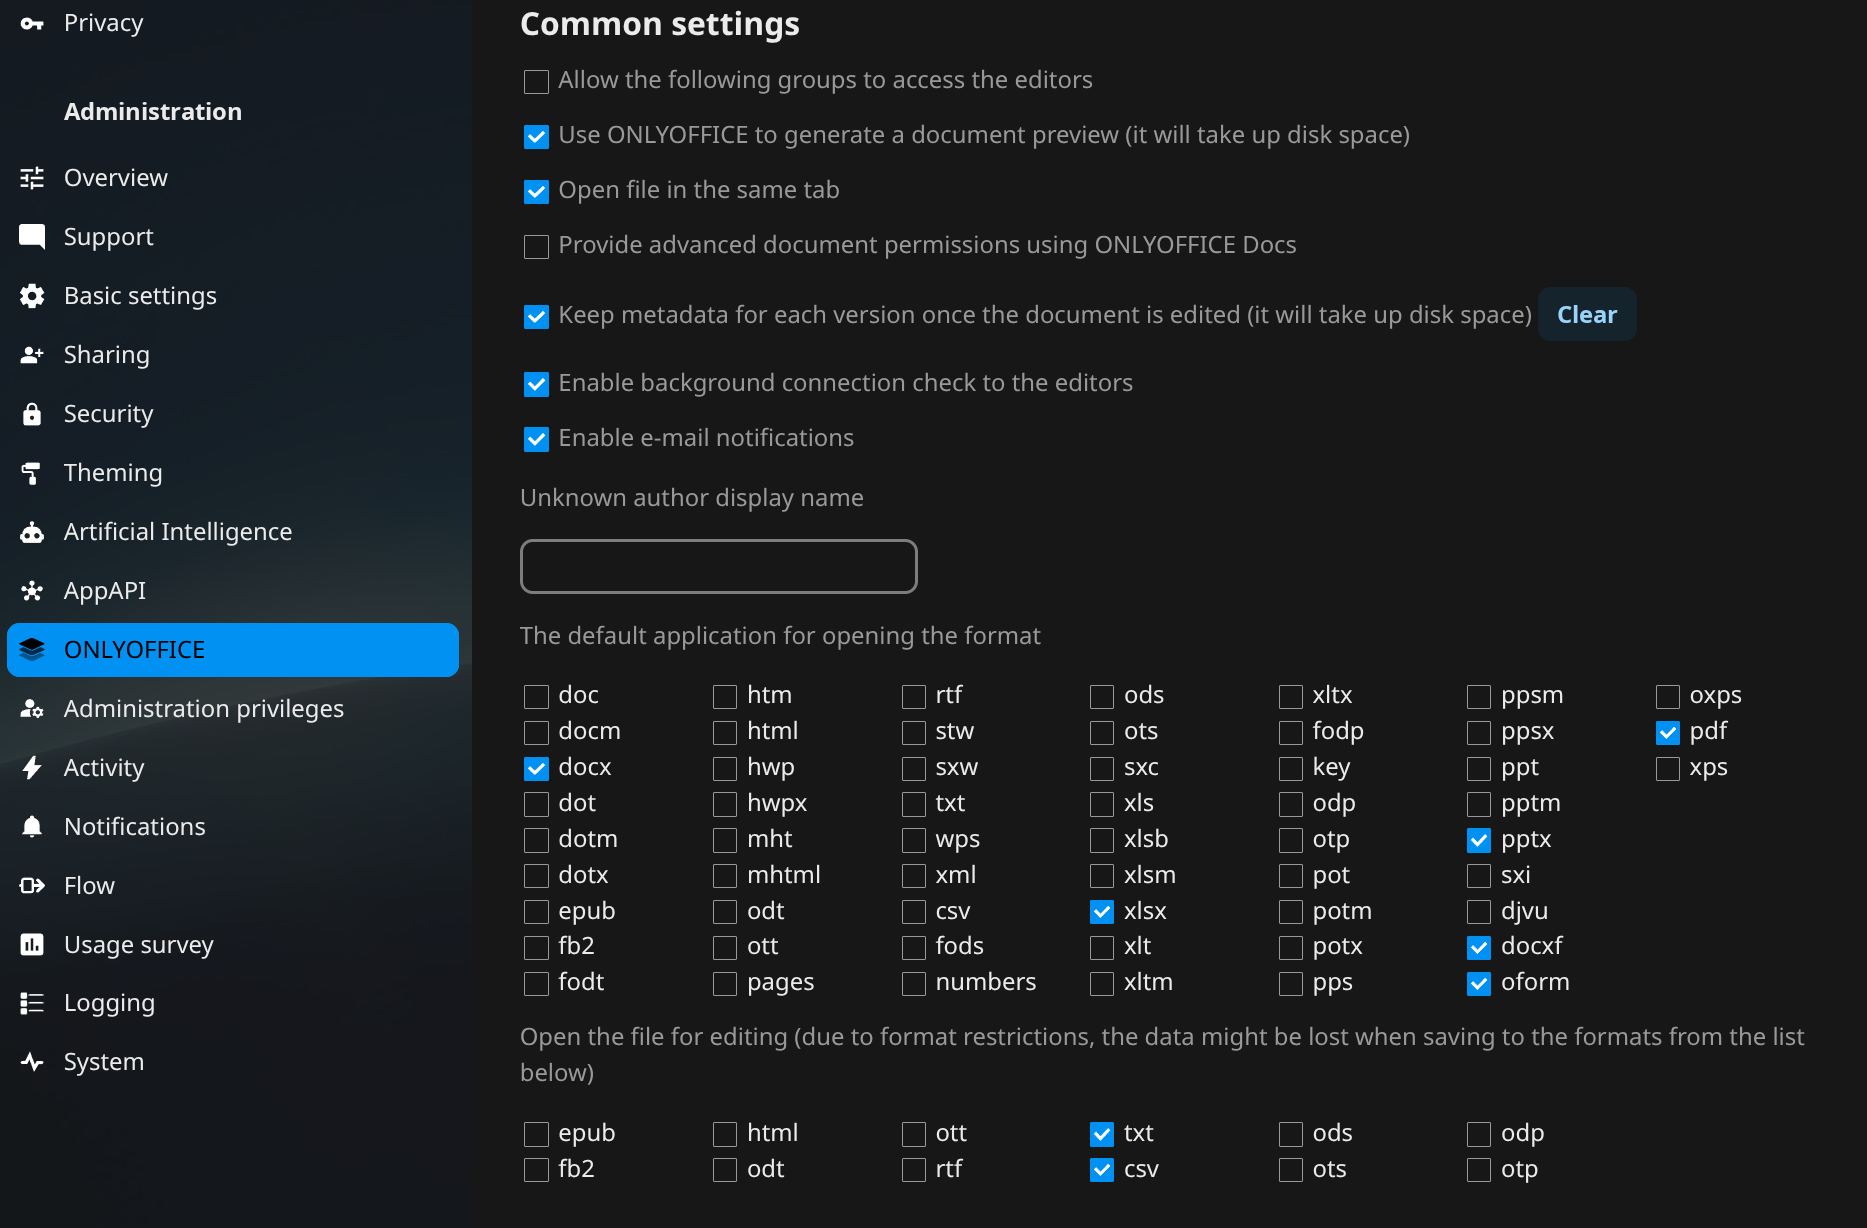
If everything is correct, you’ll see additional options to configure supported file types:
End-to-End Test
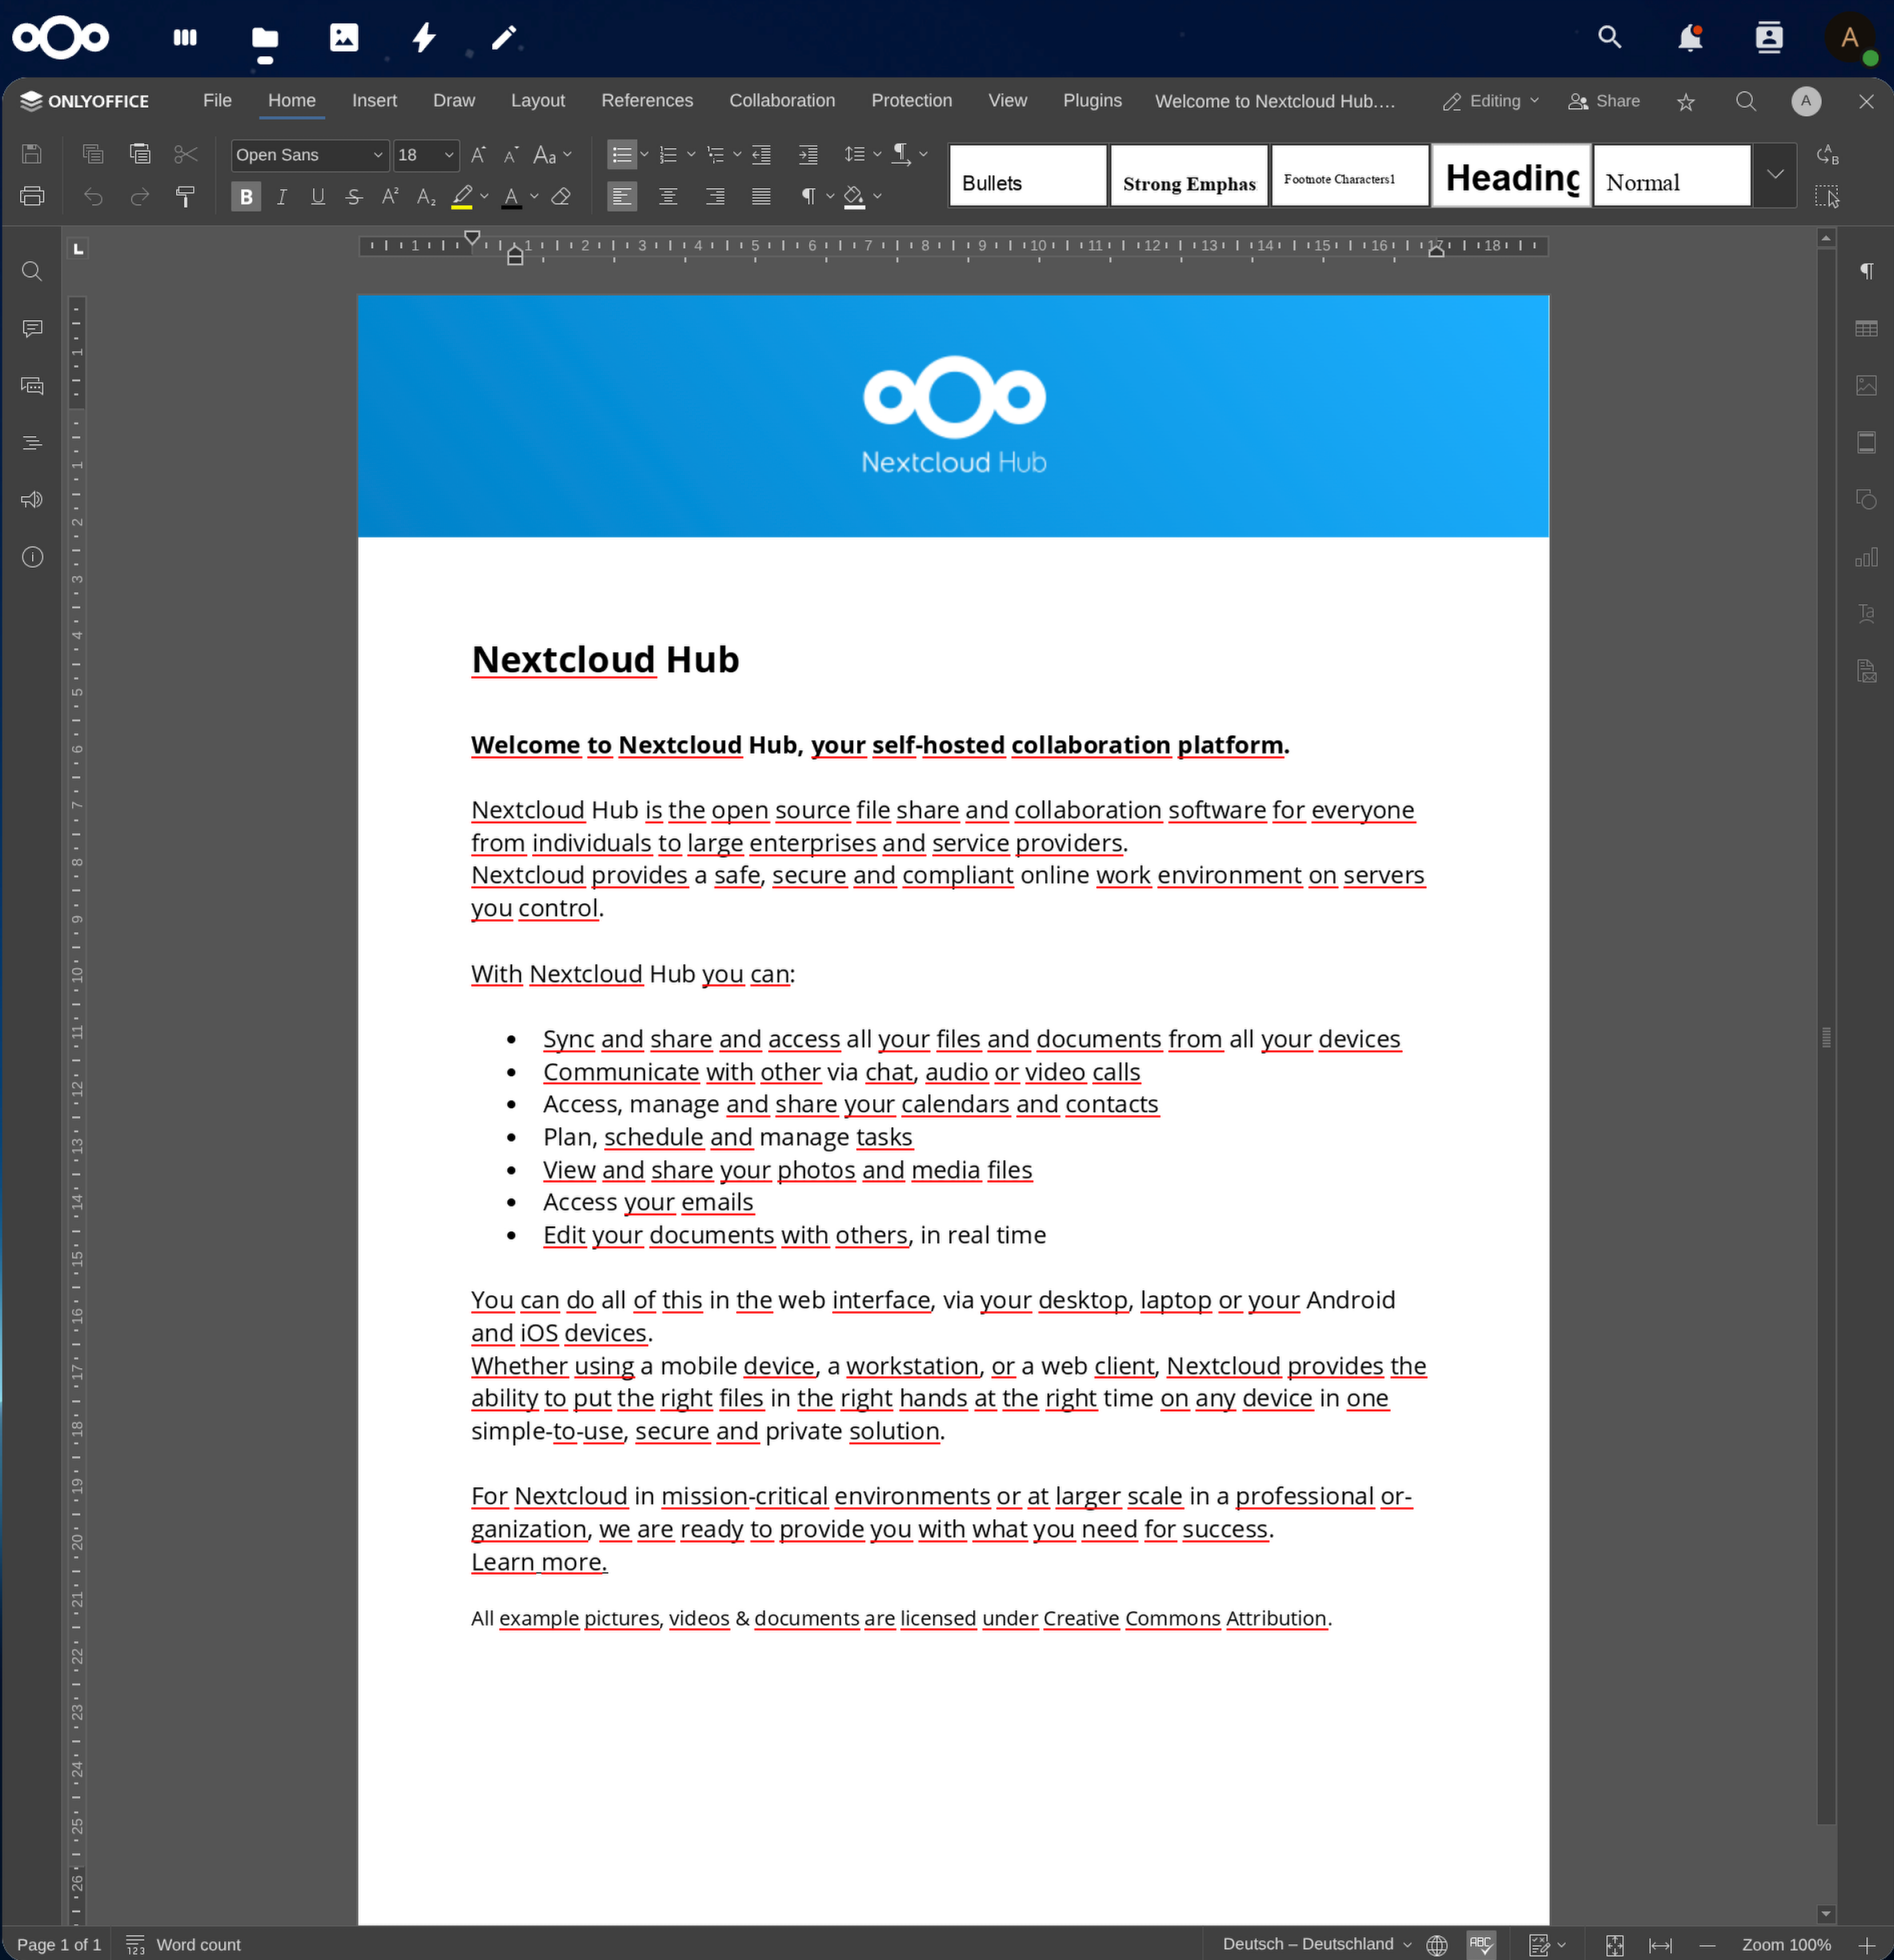
Upload or open a document in Nextcloud. It should now open directly in the ONLYOFFICE editor:
Exposing ONLYOFFICE to the Internet
If your Nextcloud instance is publicly accessible, you’ll need to expose the ONLYOFFICE server as well. Ensure:
- You set the public URL of ONLYOFFICE in the Nextcloud settings
- You use HTTPS in production with a reverse proxy
Security Best Practices
- Use a strong
JWT_SECRETand keep it private - Never expose ONLYOFFICE over plain HTTP in production—use HTTPS
- Disable the example test once setup is complete
- Keep both ONLYOFFICE and Nextcloud up to date with security patches